Thanks to Evernote, I have been able to go completely paperless in my new home office. For years this was a dream of mine; now it is a reality.

In this post, I want to explain how to use a scanner with Evernote. This has been the single biggest clutter-buster for me. No more stacks of paper sitting on my desk or credenza. Those days are history!
Instead, I scan all loose papers—receipts, invitations, business cards, bills, warranties, letters, and even entire seminar notebooks—directly into Evernote.
Here’s how you can do the same thing in seven steps:
- Buy an Evernote-compatible scanner. I opted for the Fujitsu ScanSnap S1300. Fujitsu, Canon, and Lexmark all make models that sync directly to Evernote. This saves you the step of scanning into a PDF and then importing into Evernote—a huge timesaver.
- Set up the scanner. This is the trickiest part. The ScanSnap process is not automatic. I tried it on two different computers with the same results each time. I had to setup an Evernote profile manually. Fujitsu needs to make this process easier. However, once it is setup, it is as simple as inserting your paper and pushing a button.
In case you have to do this yourself, here is what my Settings look like. If this doesn’t apply to you, just skim past these images to Step #3.
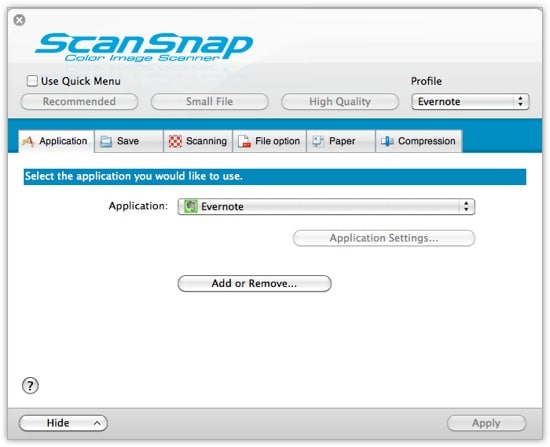
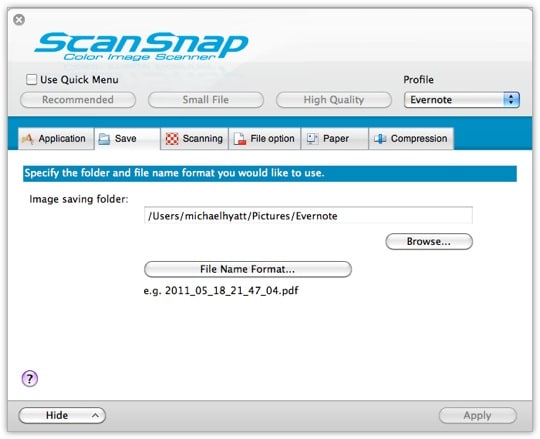
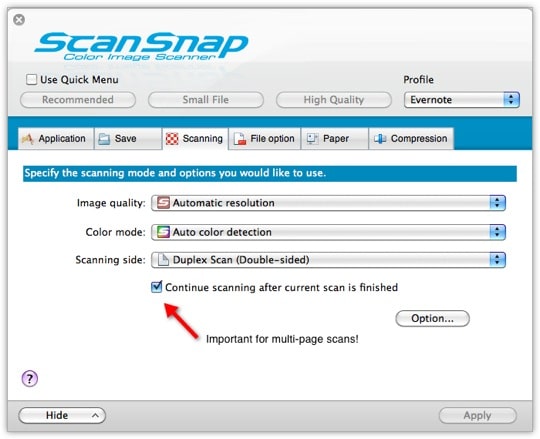
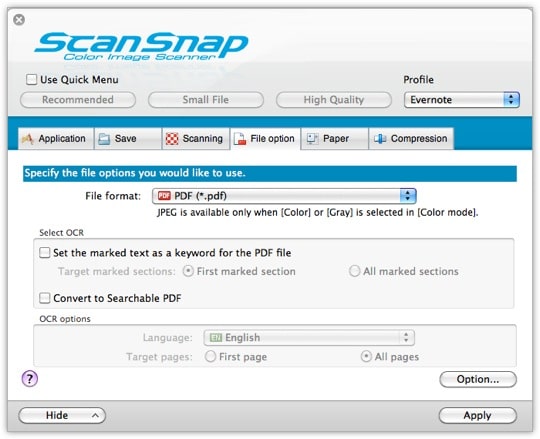
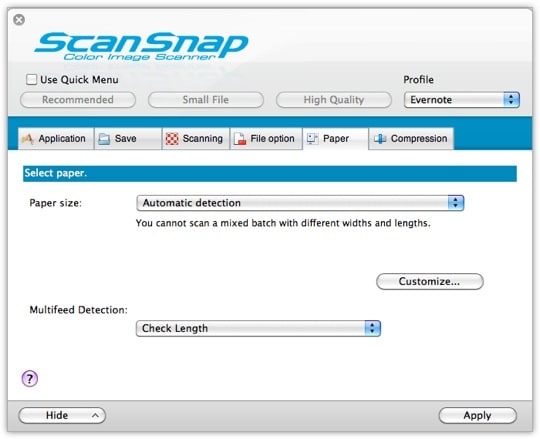
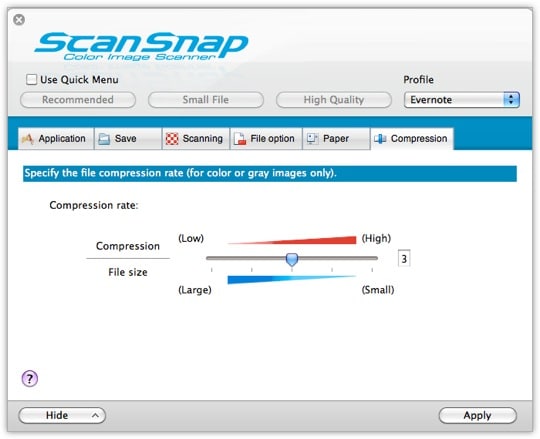
- Gather all your loose papers. I had about a foot-high stack of loose papers when I started. I had everything from receipts, to bills, invitations, and multi-page manuals and white papers. There’s almost nothing you can’t scan into Evernote. The ScanSnap handles paper of all sizes up to 8½ inches wide. As long as it is not thicker than normal paper or even light card stock, you can scan it.
- Start scanning. I just started scanning and figured it out as I went. I got progressively better and faster. The ScanSnap even compensates for misaligned or downright crooked scans. It straightens them on the fly, so that the images are almost perfectly vertical. It took me about half a day to get through the paper I had accumulated.
- File and tag each item. You will want to enter “metadata” (i.e., information about the information) in the Evernote item that is created. For example, with receipts, I always start with the date, the vendor, and the amount. I use minimal tags; sometimes I don’t use any. Evernote indexes everything in the document, so you don’t need to repeat that in the tags. A good rule of thumb is to tag items with information that doesn’t appear in the document. Here’s an example:
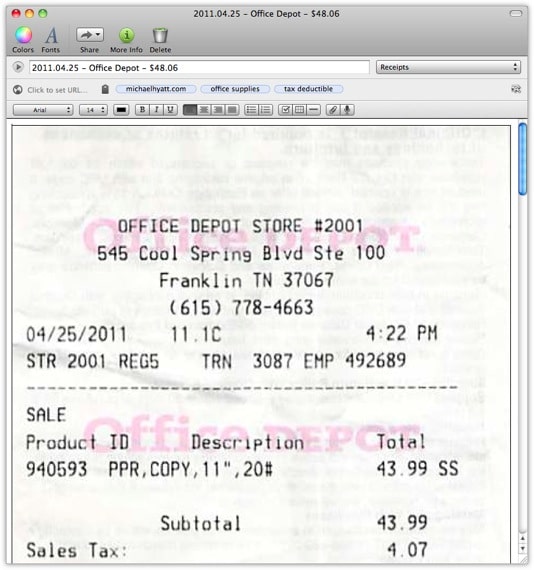
- Throw the paper away. Yep, that’s right. Just throw it away. Or better yet, recycle it. Is your data safe? Yes. You have a local copy on your hard drive. Hopefully, you also have a backup of that. In addition, you have a copy securely backed up on the evernote servers. If you are skeptical, you might want to read this Evernote blog post on data protection. By the way, I do keep paper copies of a very few important records (e.g., birth certificates, passports, etc.) though I have also scanned them.
- Rinse and repeat. Scanning with Evernote is surprisingly easy once you get it set up. It doesn’t take any more time than creating a paper file, plus you have it instantly available and searchable no matter where you happen to be, thanks to the magic of “cloud syncing.”
Buying a scanner will set you back a few hundred dollars. I certainly hesitated when I saw the price tag. But it has been one of the best investments I have ever made. I love working in a clutter-free environment where I can instantly retrieve the information I need.
- How to Organize Evernote for Maximum Efficiency
- How to Use Evernote If You Are a Speaker or Writer
- How to Use Evernote with a Traditional Paper Notebook
- How to Use Evernote with an iPad to Take Meeting Notes
- How to Email Your Documents Directly to Evernote
- How to Scan Documents Directly into Evernote
- How to Get Your Stuff into Evernote
- Is Your Data Safe in Evernote?
- How to Use Evernote as a Blogger
- How to Find Your Stuff in Evernote
- 7 Evernote Resources You May Not Know About
- How to Get Your Kindle Highlights into Evernote
Disclosure of Material Connection: Some of the links in the post above are “affiliate links.” This means if you click on the link and purchase the item, we will receive an affiliate commission. Regardless, we only recommend products or services we use and believe will add value to our readers. We are disclosing this in accordance with the Federal Trade Commission’s 16 CFR, Part 255: “Guides Concerning the Use of Endorsements and Testimonials in Advertising.

